
今回はTailwind CSSを導入し、簡単なコンポーネントを作成します。
Tailwind CSSとは
Tailwind CSSは、高度にカスタマイズ可能なユーティリティファーストのCSSフレームワークです。ユーティリティファーストとは、小さい単位(ユーティリティ)のクラスを組み合わせてデザインを構築するアプローチのことで、そのための多くのプリセットクラスが提供されています。
特徴
- ユーティリティファースト: HTMLの中で直接、スタイリングができるため、CSSファイルを跨いで行ったり来たりする必要がありません。
- カスタマイズ可能: プロジェクトの特定のデザイン要件に合わせて、設定ファイルを使って色、サイズ、余白などをカスタマイズすることが可能です。
- レスポンシブデザイン: レスポンシブデザインのプレフィックスが提供されているため、さまざまなデバイスサイズでの表示を容易にコントロールできます。
- プラグインシステム: カスタムユーティリティやコンポーネントを簡単に追加するためのプラグインシステムも提供しています。
Angularでのサポート状況
Angular v11.2から公式にサポートされています。
Tailwind CSSを導入する
では、AngularプロジェクトにTailwind CSSを導入していきます。基本的には公式の手順に従って進めます。
$ npm install -D tailwindcss postcss autoprefixer

added 26 packages, changed 1 package, and audited 1161 packages in 3s

186 packages are looking for funding
  run `npm fund` for details

found 0 vulnerabilities
$ npx tailwindcss init

Created Tailwind CSS config file: tailwind.config.js必要なパッケージをインスト−ルし、tailwind.config.jsが作成されます。
続いてtailwind.config.jsを以下のように変更します。
/** @type {import('tailwindcss').Config} */
module.exports = {
- content: [],
+ content: [
+   "./src/**/*.{html,ts}",
+ ],
  theme: {
    extend: {},
  },
  plugins: [],
}修正後のtailwind.config.jsは以下のようになります。
/** @type {import('tailwindcss').Config} */
module.exports = {
  content: ['./src/**/*.{html,ts}'],
  theme: {
    extend: {},
  },
  plugins: [],
};
続いてsrc/styles.cssを以下のように編集します。
/* You can add global styles to this file, and also import other style files */
@tailwind base;
@tailwind components;
@tailwind utilities;
元々あるコメントは追加しても削除してもどちらでも構いません。
ここまででインストールは完了です。実際に使用可能か動作確認をしてみます。
まずは開発サーバーを起動します。
$ ng serve
✔ Browser application bundle generation complete.

Initial Chunk Files   | Names         |  Raw Size
vendor.js             | vendor        |   1.98 MB |
polyfills.js          | polyfills     | 333.16 kB |
styles.css, styles.js | styles        | 242.41 kB |
main.js               | main          |  46.29 kB |
runtime.js            | runtime       |   6.53 kB |

                      | Initial Total |   2.59 MB

Build at: 2023-08-06T07:20:58.691Z - Hash: 34fc5b5c11ac8fa2 - Time: 4089ms

** Angular Live Development Server is listening on localhost:4200, open your browser on http://localhost:4200/ **


✔ Compiled successfully.
ng serveコマンドは開発サーバーを起動するコマンドです。デフォルトでは4200ポートを使用します。
動作確認をするために、src/app/app.component.htmlを以下のように書き換えます。
<h1 class="text-3xl font-bold underline">Hello world!</h1>元々ある大量のコードはすべて削除しています。
変更保存をするとすぐに反映されます。では、http://localhost:4200/にアクセスし、以下のように表示されればTailwind CSSが有効になっています。

Tailwind CSSを便利にする拡張機能をインストールする
Tailwind CSSでのプログラミングを便利にする拡張機能をいくつかご紹介します。
Tailwind CSS IntelliSense

Tailwind CSSのオートコンプリート、リント、class属性で設定されるスタイルのプレビューなどの機能を提供する拡張機能です。
Tailwind Fold
Tailwind CSSを使用するとclass属性が長くなりがちです。これはコード全体の可読性低下にもつながるため、この拡張機能で普段は省略表示しておくとよいでしょう。
Tailwind Documentation
Tailwind CSSのドキュメントにすばやくアクセスするための拡張機能です。最近ではチートシートサイトがいくつもりますので、そちらの方が使いやすければこの拡張機能は特に使う必要はありません。
コンポーネントを作成する
動作確認は行っていますが、実際にコンポーネントを作成してみましょう。
ここで作成するコンポーネントは先ほど動作確認のために作成したタグをコンポーネント化してみましょう。
コンポーネントのひな形を自動生成する
ng generateコマンドを使ってコンポーネントのひな形を作成します。コンポーネントを作成する場合はcomponentを指定して、その後に生成するコンポーネントのパスを書きます。
$ ng generate component shared/components/title
CREATE src/app/shared/components/title/title.component.css (0 bytes)
CREATE src/app/shared/components/title/title.component.html (20 bytes)
CREATE src/app/shared/components/title/title.component.spec.ts (552 bytes)
CREATE src/app/shared/components/title/title.component.ts (198 bytes)
UPDATE src/app/app.module.ts (390 bytes)コマンドは省略形もありますが、今回は省略せずに書きました。また、コンポーネントのパスにはsrc/app/を含まない点に注意してください。
コンポーネントを作成する
このコンポーネントは呼び出し元からテキスト(先ほど作成したタグのHello world!の部分)を受け取って表示するコンポーネントにします。
まずはtitle.component.tsから作成します。自動生成したコードは次のようになっています。
import { Component } from '@angular/core';

@Component({
  selector: 'app-title',
  templateUrl: './title.component.html',
  styleUrls: ['./title.component.css']
})
export class TitleComponent {

}
詳しくは別途解説しますが、コンポーネントを使用する側から何か値を受け取るには@Inputディレクティブを使用します。
修正後のtitle.component.tsは以下のとおりです。
import { Component, Input } from '@angular/core';

@Component({
  selector: 'app-title',
  templateUrl: './title.component.html',
  styleUrls: ['./title.component.css'],
})
export class TitleComponent {
  @Input() title: string;

  constructor() {
    this.title = '';
  }
}
titleというメンバ変数に@Input()を付与し、呼び出し元から受け取れるようにしています。
次にtitle.component.htmlを作成します。
<h1 class="text-3xl font-bold underline">{{ title }}</h1>先ほどTitleComponentに追加したtitleを表示しています。
では実際に使ってみましょう。app.component.htmlを以下のように修正します。
<app-title title="{{ title }}" />app-titleコンポーネントのtitle属性にAppComponentのtitleを設定します。

AppComponentのtitleメンバに設定されている文言が表示されれば期待したとおりの動作になっています。
テストを行う
最後にテストを行いましょう。
今回作成したTestComponentとHTMLを変更したAppComponentの両方を修正します。
まずはTestComponentのテストです。
import { ComponentFixture, TestBed } from '@angular/core/testing';

import { TitleComponent } from './title.component';

describe('TitleComponent', () => {
  let component: TitleComponent;
  let fixture: ComponentFixture<TitleComponent>;

  beforeEach(() => {
    TestBed.configureTestingModule({
      declarations: [TitleComponent],
    });
    fixture = TestBed.createComponent(TitleComponent);
    component = fixture.componentInstance;
    fixture.detectChanges();
  });

  it('should create the title component', () => {
    expect(component).toBeTruthy();
  });

  it('should have as title an empty string', () => {
    expect(component.title).toEqual('');
  });

  it('should display the title', () => {
    const expected = 'Test title';
    component.title = expected;
    fixture.detectChanges();

    const compiled = fixture.nativeElement;
    expect(compiled.querySelector('h1').textContent).toContain(expected);
  });
});次にAppComponentのテストです。
import { TestBed } from '@angular/core/testing';
import { AppComponent } from './app.component';
import { TitleComponent } from './shared/components/title/title.component';

describe('AppComponent', () => {
  beforeEach(() =>
    TestBed.configureTestingModule({
      declarations: [AppComponent, TitleComponent],
    }),
  );

  it('should create the app', () => {
    const fixture = TestBed.createComponent(AppComponent);
    const app = fixture.componentInstance;
    expect(app).toBeTruthy();
  });

  it(`should have as title 'angular-tutorial'`, () => {
    const fixture = TestBed.createComponent(AppComponent);
    const app = fixture.componentInstance;
    expect(app.title).toEqual('angular-tutorial');
  });

  it('should render title', () => {
    const fixture = TestBed.createComponent(AppComponent);
    fixture.detectChanges();
    const compiled = fixture.nativeElement as HTMLElement;
    expect(compiled.querySelector('app-title h1')?.textContent).toContain('angular-tutorial');
  });
});テストの実行はng testコマンドを使用します。
$ ng test
✔ Browser application bundle generation complete.
06 08 2023 20:16:25.133:WARN [karma]: No captured browser, open http://localhost:9876/
06 08 2023 20:16:25.140:INFO [karma-server]: Karma v6.4.2 server started at http://localhost:9876/
06 08 2023 20:16:25.140:INFO [launcher]: Launching browsers Chrome with concurrency unlimited
06 08 2023 20:16:25.141:INFO [launcher]: Starting browser Chrome
06 08 2023 20:16:25.984:INFO [Chrome 115.0.0.0 (Mac OS 10.15.7)]: Connected on socket A-bmpclSUPRNDYqsAAAB with id 34000686
Chrome 115.0.0.0 (Mac OS 10.15.7): Executed 6 of 6 SUCCESS (0.035 secs / 0.024 secs)
TOTAL: 6 SUCCESS
テストではブラウザが開き結果が表示されます。
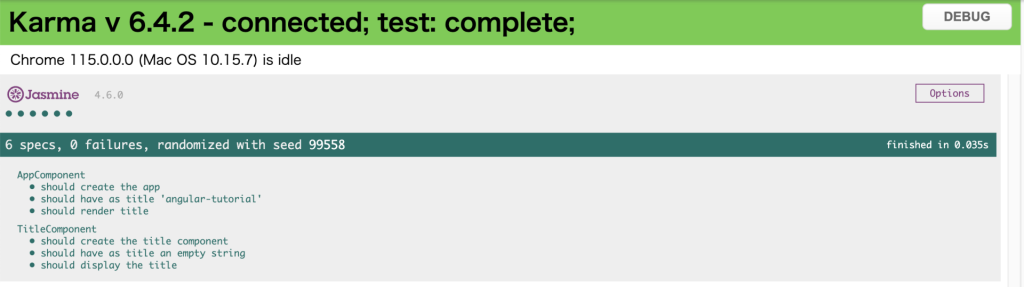
テストは起動しっぱなしにしておいて、コードを変更すればリロードされます。
コミットとプッシュを行う
ここまでの変更をコミット、プッシュします。
$ git add .
$ git commit -m 'add tailwind css'
✔ Preparing lint-staged...
✔ Running tasks for staged files...
✔ Applying modifications from tasks...
✔ Cleaning up temporary files...
[main 90cd6c9] add tailwind css
 11 files changed, 428 insertions(+), 633 deletions(-)
 create mode 100644 src/app/shared/components/title/title.component.css
 create mode 100644 src/app/shared/components/title/title.component.html
 create mode 100644 src/app/shared/components/title/title.component.spec.ts
 create mode 100644 src/app/shared/components/title/title.component.ts
 create mode 100644 tailwind.config.js
$ git push
Enumerating objects: 26, done.
Counting objects: 100% (26/26), done.
Delta compression using up to 10 threads
Compressing objects: 100% (14/14), done.
Writing objects: 100% (17/17), 5.50 KiB | 1.10 MiB/s, done.
Total 17 (delta 6), reused 0 (delta 0), pack-reused 0
remote: Resolving deltas: 100% (6/6), completed with 6 local objects.
To github.com:t0k0sh1/angular-tutorial.git
   58ad1f8..90cd6c9  main -> main
まとめ
今回はTailwind CSSを導入し、コンポーネントを作成しました。
今回sharedにTitleComponentを作成したのですが、このコンポーネントはAppModuleに含まれています。AppModuleにすべてのコンポーネントを含めるのではなく、いくつかのモジュールに分けた方が管理しやすいです。
次回はSharedModuleを作成してTitleComponentを含めるように変更する手順を解説します。