API Gateway REST APIに対してIP制限をかける必要があったので手順を確認しました。
動作確認用のAPI Gateway REST APIを作成する
まずはAPI GatewayでAPIを作成します。以下の手順に従って作成していきます。
手順
API Gatewayコンソールhttps://console.aws.amazon.com/apigatewayにアクセスします。
選択肢の中から、REST APIの構築ボタンをクリックします。

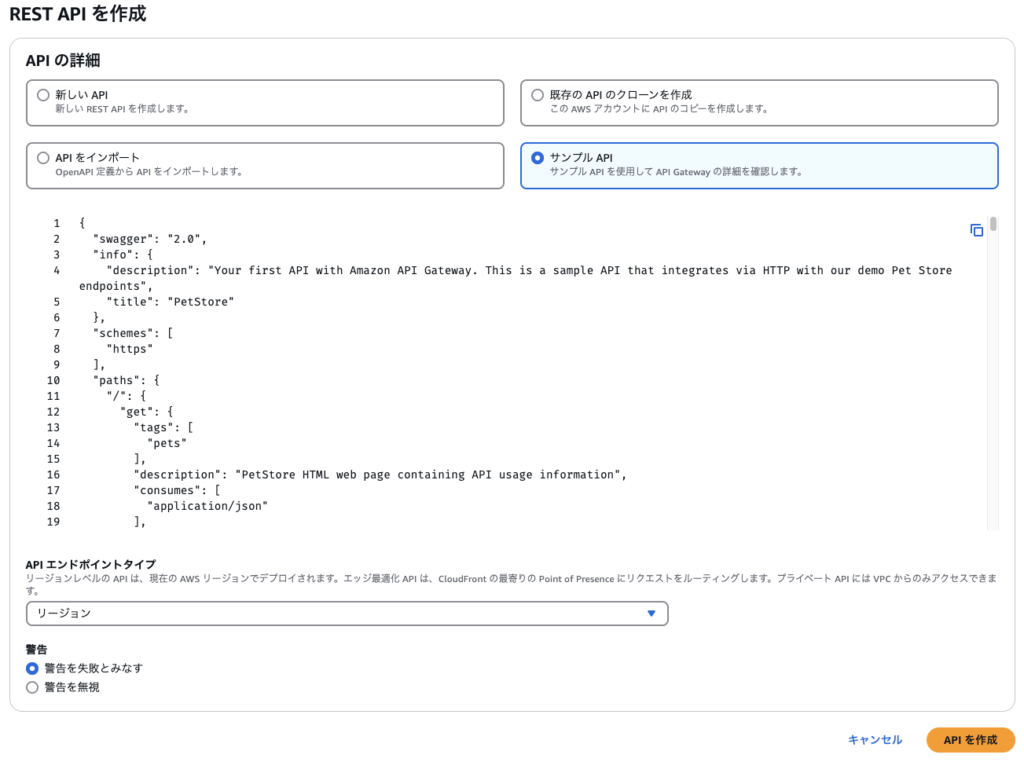
API Gatewayを作成することは今回の主眼とは関係ないため、サンプルAPIを選択して作成します。
REST APIPetStoreが作成されました。
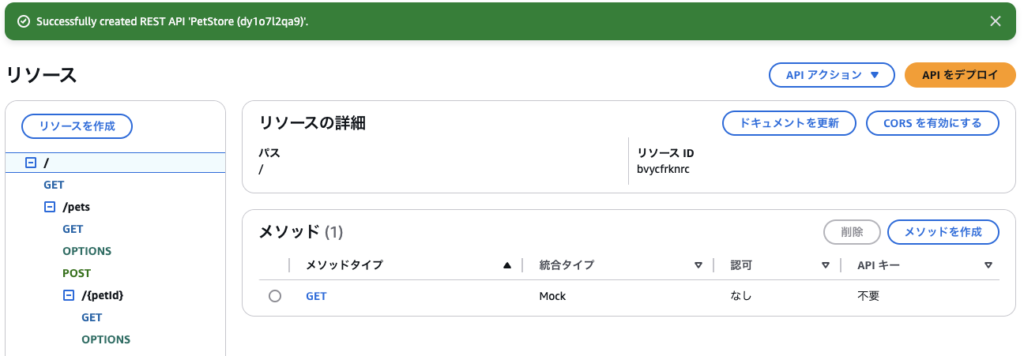
これは必須ではありませんが、デプロイする前にテストをして動作確認をしておきます。/ > /pets > POSTをクリックして、「テスト」を選択します。
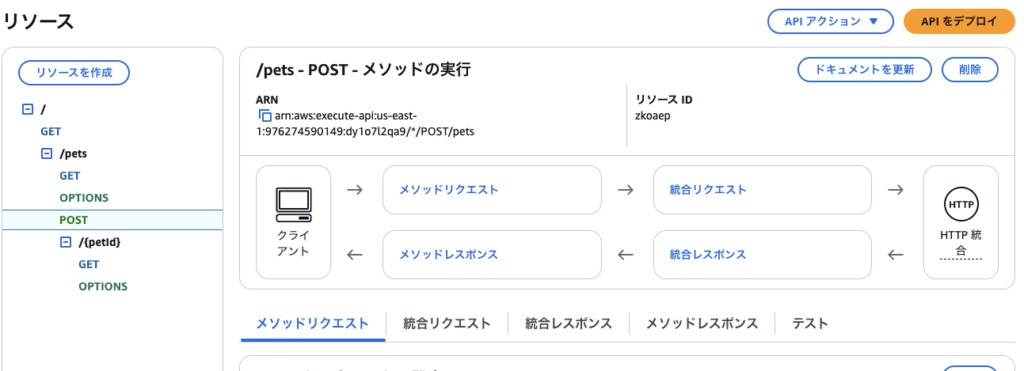
手順に従って、{"type": "dog","price": 249.99}というテキストをリクエスト本部に貼り付け、テストボタンをクリックします。

ステータスが200になっていればテスト成功です。

動作確認ができたらAPIをデプロイボタンをクリックしてデプロイします。

今回はテスト用なので手順と同じくtestというステージを作成します。

デプロイはすぐに完了します。
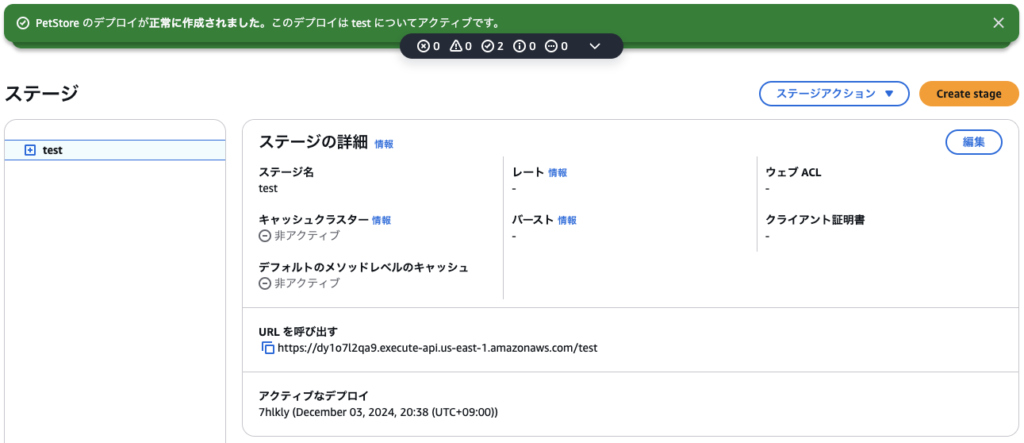
動作確認のためにURLを呼び出すボタンをクリックしてのURLをコピーし、実際に使用可能なことを確認します。
自端末のターミナルからcurlコマンドで実行してみます。
$ curl https://dy1o7l2qa9.execute-api.us-east-1.amazonaws.com/test
<html>
    <head>
        <style>
        body {
            color: #333;
            font-family: Sans-serif;
            max-width: 800px;
            margin: auto;
        }
        </style>
    </head>
    <body>
        <h1>Welcome to your Pet Store API</h1>
        <p>
            You have successfully deployed your first API. You are seeing this HTML page because the <code>GET</code> method to the root resource of your API returns this content as a Mock integration.
        </p>
        <p>
            The Pet Store API contains the <code>/pets</code> and <code>/pets/{petId}</code> resources. By making a <a href="/test/pets/" target="_blank"><code>GET</code> request</a> to <code>/pets</code> you can retrieve a list of Pets in your API. If you are looking for a specific pet, for example the pet with ID 1, you can make a <a href="/test/pets/1" target="_blank"><code>GET</code> request</a> to <code>/pets/1</code>.
        </p>
        <p>
            You can use a REST client such as <a href="https://www.getpostman.com/" target="_blank">Postman</a> to test the <code>POST</code> methods in your API to create a new pet. Use the sample body below to send the <code>POST</code> request:
        </p>
        <pre>
{
    "type" : "cat",
    "price" : 123.11
}
        </pre>
    </body>
</html>%
大丈夫そうですね。
リソースポリシーで特定のIPのみがアクセスできるように制限する
次にリソースポリシーで特定のIP(今回は自端末のIP)のみアクセスできるように制限をかけてみます。
手順は以下の「特定の IP アドレスのみが API Gateway REST API にアクセスすることを許可するリソースポリシーを作成およびアタッチする」に従って行っていきます。
手順
API Gatewayコンソールhttps://console.aws.amazon.com/apigatewayにアクセスします。
リソースから先ほど作成したPetStoreAPIを選択します。

左のナビゲーションペインでリソースポリシーを選択すると、以下のような画面が表示されます。

デプロイ直後はリソースポリシーは設定されていないため、ポリシーを作成ボタンをクリックし、ポシリーの詳細下のドロップダウンリストからIP範囲拒否リストを選択すると、以下のようなポリシーが表示されます。
{
    "Version": "2012-10-17",
    "Statement": [
        {
            "Effect": "Deny",
            "Principal": "*",
            "Action": "execute-api:Invoke",
            "Resource": "execute-api:/{{stageNameOrWildcard}}/{{httpVerbOrWildcard}}/{{resourcePathOrWildcard}}",
            "Condition" : {
                "IpAddress": {
                    "aws:SourceIp": [ "{{sourceIpOrCIDRBlock}}", "{{sourceIpOrCIDRBlock}}" ]
                }
            }
        },
        {
            "Effect": "Allow",
            "Principal": "*",
            "Action": "execute-api:Invoke",
            "Resource": "execute-api:/{{stageNameOrWildcard}}/{{httpVerbOrWildcard}}/{{resourcePathOrWildcard}}"
        }
    ]
}
色々試してみたのですが、許可のみ記載したポリシーだと指定したIPまたはCIDRブロックのみを許可できるようです。
{
    "Version": "2012-10-17",
    "Statement": [
        {
            "Effect": "Allow",
            "Principal": "*",
            "Action": "execute-api:Invoke",
            "Resource": "execute-api:/*",
            "Condition" : {
                "IpAddress": {
                    "aws:SourceIp": [ "{{sourceIpOrCIDRBlock}}" ]
                }
            }

        }
    ]
}このポリシー中の{{sourceIpOrCIDRBlock}}を自身のグローバルIPに置き換えてください。
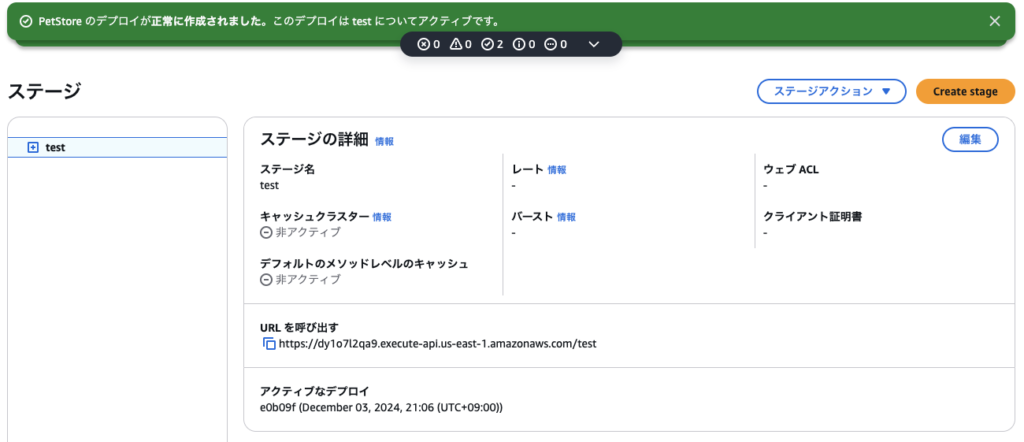
ポリシーが作成できたら、右下の変更を保存ボタンをクリックします。リソースポリシーを変更したら、それを反映させるために左のナビゲーションペインでリソースを選択し、APIをデプロイボタンをクリックしします。

先ほど作成したステージを選択してデプロイします。

デプロイが完了したことを確認します。
動作確認
設定が完了したので、動作確認をします。まずは自端末から変わらずアクセスできることを確認します。
$ curl https://dy1o7l2qa9.execute-api.us-east-1.amazonaws.com/test
<html>
    <head>
        <style>
        body {
            color: #333;
            font-family: Sans-serif;
            max-width: 800px;
            margin: auto;
        }
        </style>
    </head>
    <body>
        <h1>Welcome to your Pet Store API</h1>
        <p>
            You have successfully deployed your first API. You are seeing this HTML page because the <code>GET</code> method to the root resource of your API returns this content as a Mock integration.
        </p>
        <p>
            The Pet Store API contains the <code>/pets</code> and <code>/pets/{petId}</code> resources. By making a <a href="/test/pets/" target="_blank"><code>GET</code> request</a> to <code>/pets</code> you can retrieve a list of Pets in your API. If you are looking for a specific pet, for example the pet with ID 1, you can make a <a href="/test/pets/1" target="_blank"><code>GET</code> request</a> to <code>/pets/1</code>.
        </p>
        <p>
            You can use a REST client such as <a href="https://www.getpostman.com/" target="_blank">Postman</a> to test the <code>POST</code> methods in your API to create a new pet. Use the sample body below to send the <code>POST</code> request:
        </p>
        <pre>
{
    "type" : "cat",
    "price" : 123.11
}
        </pre>
    </body>
</html>%
問題なくアクセスできています。
次に異なるグローバルIPを持つ端末からアクセスしてみてください。例えば、PCからアクセスしている場合はスマートフォンのWiFiをOFFにして、ブラウザで同じアドレスにアクセスしてみてください。
{"Message":"User: anonymous is not authorized to perform: execute-api:Invoke on resource: arn:aws:execute-api:us-east-1:********0149:dy1o7l2qa9/test/GET/"}IP制限が効いていると、上記のようなメッセージが返ってきます。
まとめ
IP制限や経路制限を変える方法はいくつかあります。
- HTTP APIで作成し、VPCリンクで制限する
- REST APIプライベートで作成し、リソースポリシーで許可するVPCを制限
今回はAPI Gatewayを作成し直す訳にはいかない事情があったので、このような対応にしました。
